Incrobots - puzzle game
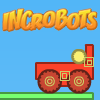
Incrobots is a free online flash game of the category puzzle games.
Build custom robots in your browser with Incrobots! Design your robot by drawing shapes, joints, motors and more! Then, pilot your machine using your own custom key bindings. Compete in challenges or create them yourself for others to solve. Save replays and embed them anywhere as movies. Use the editor to tell animated stories, create Rube Goldberg machines, or just experiment and have fun with physics!
Based on Incredibots which gone off-line december 2010.
1) Main Menu
When you start the game, you'll be greeted with the Main Menu. From there, you'll decide if you want to get learning (Levels), thinking (Challenges), or just building to your heart's content (Sandbox). At the top-left corner of the Main Menu, you'll find the Load Replay, Load Bot, and Sandbox buttons. Each of these, of course, will begin their respective modes, but before we get into those, let's talk a bit more about the foundations of the game!
If it's your first time playing, you'll probably want to play around in the Levels first, as they'll effectively teach you how to build robots and make use of the game's physics engine. You'll learn the basics and mechanics of the game through playing all eight levels; choose any level you like; there is no penalty for going out of order! Levels can be selected from the table of buttons at the top-right part of the Main Menu.
Once you're familiar with how the game works and how robots can be built, you'll probably want to flex your brain a bit and customise your own robot in one of the nine Challenges, each of which is listed in the large table on the lower-half of the screen, along with the difficulty levels you'll get to choose from for each task. Each Challenge has a specific objective that must be reached, and you'll only have a certain number of Credits to build your robot with in order to meet those goals. Oh, and you'll be timed as well ââ¬" but better times lead to greater bragging rights among your fellow Incrobots Builders, so practice makes perfect! As you might expect, each of the nine Challenges has three difficulty levels to choose from, with the harder levels adding difficulty by limiting how much material you can use in the construction of your robot. But hey ââ¬" you're smart, you'll figure it out!
Finally, there's the Sandbox Mode, a place where you can really give your imaginative gears a grind! Sandbox Mode is the big empty canvas of Incrobots, where you get to supply the paint: you can make any robot or wild contraption-device-object you'd like, and once you've built it, you'll be able to film it using the Replay function!
2) The Robot Building Screen
After selecting any of the three game modes (Levels, Challenges, Sandbox), you will find yourself at The Robot Building Screen. From here, you will be constructing all of your robots and machines, from the ground up! Your options and materials are represented in the buttons displayed on the toolbar at the top of the screen, with the creation tools being displayed as the group of blue buttons.
If you'd like to take a look at the environment that's been generated for you to play around in, simply click your mouse cursor anywhere in the worldview, hold down the mouse button, and drag around to your heart's content! (This will come in quite handy for the harder modes.) Alternatively, you can use your keyboard's arrow keys to pan the view. And, in the toolbar at the top of the screen, you'll see buttons that will allow you to Zoom In and Out.
At the very top of the screen, you'll see the drop-down menus. They are: File, Edit, View, Share!, and Help. "File" will allow you to save robots and replays, log in to the online Incrobots database, and view your High Scores. The "Edit" menu provides shortcuts for manipulating your shapes, objects, and robots (Cut/Copy/Paste/Undo/etc.). The "View" menu will help you gain some new perspective on your robot and the world around it; allowing you to Zoom In or Out, Show Joints/Colours/Outlines, Center on a selected object, and Snap to Center.
("Snap to Center" is a very significant option to be aware of, as having it checked will allow you to place joints exactly in the center of circles. Turning it off can also be handy at times; for example, if you wanted to place a joint near the center of an object, but not precisely on it.)
The "Share!" menu will allow you to comment on a robot on the forums, link to a saved copy of the robot, or embed it in your website or blog. The "Help" menu will hopefully lead to a solution for whatever problem you're having with the game!
When you're ready to start building your robot, you'll want to click on either the Circle, Rectangle, or Triangle buttons to lay your basic foundations for the robot.
(**REMEMBER: This is a physics-based game, so try to avoid creating robot parts and bodies that are too large, as that will make them heavier and the motors you'll be equipping on your ââ¬Ëbots may not be able to move such large/heavy shapes!)
If you want to draw a Circle, Rectangle, or Triangle, after you've clicked the corresponding button you'll want to click your mouse in the main view window and drag the mouse to make the object as large or as small as you'd like. When drawing Triangles, you will need to set the three points of the object; just click once for each point, anywhere on the main window.
Now that you've got your shape and its size all settled, you'll notice that a menu has popped up on the left-hand side of the screen, allowing you to further manipulate your nice new objects by altering their density, enabling the camera to focus on and track the movements of a particular object (which can be very important for replays), changing their colour and appearance, and rotating, cutting-copying, and deleting them.
(**IMPORTANT: in the world of Incrobots, copy-pasting is handled as follows: after you've clicked on the "Copy" button, you will need to click the "Paste" button along the top toolbar, and then you will need to click the spot on the main level screen where you want the copied object to be pasted!)
The density of a selected object can be adjusted using the menu's sliders or by entering a number in the density text box. Lower density objects are very important for lighter robot parts; however, higher density objects can make aspects of your robot heavier, which can be very important in resolving grounding and balancing issues. NOTE: Low density objects and high density objects will cost you more credits in Challenge mode! Objects that are of a "medium" density will consume the fewest number of credits.
While not as significant, the appearance of your objects can also be fully adjusted; from the colors and outlines to the opacity. If you'd like to render an object invisible, enter a zero ("0") in the Opacity text box; this can be handy for making invisible rigging for your movies, or for making crazy contraptions a la Rube Goldberg.
2-A) Joint Problems? Joint Solutions!
Once you have your body-objects made, you'll need to get them attached and functional! To do that, we've given you three Joints to choose from when creating your robots:
Fixed Joints, which attach one body-object to another with an inflexible "weld"-type joint. If you want to use this in your robot, click the blue "Fixed Joint" button and then click to place it, ideally someplace where you want to attach two objects together with no motion involved! Selecting a previously placed Fixed Joint will bring up an options menu on the left-hand side of the screen; from there, you'll be able to delete the joint.
Rotating Joints, which attach two body-objects together and will allow rotation of one part relative to another. For example, two circles attached to a rectangle via Rotating Joints could create a basic wagon or car. To create one, click the blue "Rotating Joint" button and click on an overlapping portion of the objects you want to apply the joint to. To give power to the joint, click the "Enable Motor" checkbox in the options menu which will be displayed on the left-hand side of the screen. Then, assign keys to control the motor by clicking the "Rotate CW" and "Rotate CCW" text boxes and then pressing the desired control key. In this way, you can assign any key on your keyboard to make the rotating joint move clockwise or counter-clockwise. Or, if you'd prefer to have your motor always on, you can click either the Auto-On CW or Auto-On CCW checkbox, to have the motor continuously rotate in the desired direction. Additionally, you'll be able to tweak said motor(s) by their strength and speed; for example, slower, stronger motors are handy for making rotating parts like controlled lifting arms.
Rotating Joints can also be held rigid by unchecking the Floppy Joint checkbox; the joint will then not rotate at all unless you press the assigned motor control key. The final Rotating Joint options are their rotation limits; these allow you to set the lower and upper limits, in degrees (0 to 360), at which the joint will stop rotating. These limits can be used to ensure that the joint will only rotate between specific points, and will prevent the joint from achieving continuous 360-degree rotation.
Sliding Joints, which will attach two body-objects together and will allow one part to slide relative to the other, like a piston, pogo stick, or jackhammer. To create one, click the blue "Sliding Joint" button, and then click twice: Once on each of the two objects you would like to join. Note: the distance between your two click points will determine the size of the created piston.
For Sliding Joints, the left-hand options menu will allow you to adjust the Piston Strength, Piston Speed, and the control keys used to cause the joint to Expand and Contract. Additionally, you will also have an option for your joint to "auto-oscillate," as opposed to having to press control keys to get the joint to do its thing. You can also change the joint's color and add or remove the joint's outlines.
All joints can be cut, copied, and pasted, using the usual Cut, Copy, and Paste buttons in the toolbar. Simply click on a joint, cut or copy it, then click "Paste" and click again to specify a location for the joint (click twice for sliding joints). The cut/copied joint will have the same settings as its parent joint; this can save time if you're creating a lot of joints with similar settings!
NOTE: All of the above joints will consume credits when used in challenge mode. Enabling motors, increasing motor strength, and other options, will increase credit consumption further, so tweak with care! To see how many credits you are being charged for a joint, select it. The credit cost will be displayed at the lower-left corner of the screen.
2-B) Group Selection & Dealing With Multiple Objects
In the Robot Building Screen screen, you select an object/shape by clicking on it; and if multiple objects are overlapping, you'll want to keep on clicking until the game highlights the object you want. To move a shape, click, hold, and drag it, releasing the mouse button when you have the cursor in the place where you want to put the object. Keep in mind that any other objects attached via joints will be moved as well; if you want to move jointed objects individually, you will need to delete the corresponding connecting joints first.
If you have multiple robot parts to work with, there are two ways to move things in groups. The first method is to hold down the Shift key and click on each item that you want to manipulate. The alternate method is to hold the Shift key, and then click and drag a selection box around the objects you want to manipulate. Once you've got your objects selected using either method, an options menu will pop up, allowing you to further manipulate your objects by rotating, cutting-copying, and deleting them.
2-C) Inserting and Displaying Text
By now, you've probably also noticed the blue Text button in the toolbar near the top of the screen. This will allow you to insert various text messages that can be displayed during replays. If you're using Incrobots to make a machinima movie, this will be quite handy for things like dialogue and narration; if you're making customised levels and/or robots, you'll find it has its uses for providing instructions to those who'll be playing with your toys! (And yes, it's precisely what we've used in the construction of our own replays and tutorial Levels!)
To place your text, click the Text button, then you'll want to place your text box somewhere in the level by clicking on your desired spot. (You can also click and drag to create a text box of your chosen size if you'd like. Your text box can be resized at any time by clicking and dragging any of the four corners.) Type up your lovely text in the box that will be displayed in the menu that will appear on the left-hand side of the screen; and while you're there, feel free to play around with the size and colors. You'll also notice a checkbox that says, "Scale With Zoom"; enabling this will determine whether the text will change its font size automatically when you zoom in or out of the screen, or if it will stay the same size no matter how far in or out you are. In addition, you'll see a box that says "Always Display"; this option will enable your words to stay on the screen permanently for the duration of the level, or, if unchecked, will allow you to trigger the actual display of the text you've written via the your assigned control keys. If you'd like to have the text display itself via control keys, un-check the "Always Display" box, and then click on the "Display Text Key" text box in the left-hand menu, and input your desired key. Different keystrokes can be assigned to different text boxes, and you'll be able to have as many lines of dialogue and instructions as you'd like, so don't hold back!
3) Play! And then play around with Replays!
Alright, you've built, revised, re-built, re-designed, and otherwise regard your robot as ready for fun. Time to get on with the other significant aspect of Incrobots: the gameplay! After you're finished with the Robot Building Screen, hit the "Play!" button and your robot will be sent to the field. At this point, every thing you do with your bot will be recorded by the software. (But don't worry, we won't be spying on you! Promise!) At this point you'll have some new options appear at the top of the screen for you to play around with.
First, you'll want to get familiar with the "Zoom" buttons, as they'll allow you to zoom in or out of the action in real-time as you're controlling your robot (very handy for getting a feel for the level and its objectives). Any changes you make to your Zoom level will be kept as part of the replay, along with any other changes that are made to where the camera's perspective is set. (Don't forget that you can alter the screen's position on the level by clicking and dragging at any time!)
The "Pause" button will allow you to stop and take a break, or plan your next course of action with your robot. This can be quite useful if you want to take advantage of the ability to pan or zoom without losing control of your robot, or stop and think without losing time from the Timer during Challenges. When you're done, just hit "Resume" to continue.
If you like, you can use this opportunity to Comment (on the game's forums), or take your robot's replay and share it with the world by Linking to, or Embedding your replay in your own website or blog!
If you're done playing around in the level for any reason, simply hit either the "Stop Simulation" or "Save Replay" buttons. Finishing a Challenge or introductory Level will open up some new options to you: Viewing a Replay of what you've just done, Saving a Replay, or Submitting your Score to the worldwide high score List.
A context menu should be shown when right-clicking or, on touch devices, long-pressing in the game. This menu especially allows to play in full screen and control the volume.
Similar free online flash games


Best free games all categories